Flutter is an incredible open-source UI Software Development Kit (SDK) developed by Google. It enables the creation of applications that are natively compiled for mobile platforms (iOS, Android), web, and desktop systems (Windows, macOS, Linux) using a single codebase. Flutter employs Dart, an object-oriented programming language, which was also created by Google.
Installation Steps
The following steps will be used to install Flutter from GitHub on Linux. I will be using Arch Linux, but the same steps should be applicable to other (inferior) Linux distros.
- Install dependencies.
- Install (clone) Flutter from GitHub
- Install and configure Android Studio
Install Dependencies
Install Java, Unzip and Ninja and Chromium:
$ sudo pacman -S jdk-openjdk unzip ninja chromium clang cmakeNOTE: If you already have Google Chrome installed, then there’s no need to install Chromium.
Install Flutter from GitHub
Change into your desired installation directory, and then install Flutter from GitHub:
$ cd /path/to/install/dir/
$ git clone https://github.com/flutter/flutter.gitIn ~/.bashrc (if you’re using bash), add the Flutter bin directory to your path:
export PATH=$PATH:/path/to/install/dir/flutter/binIf you want to use Chromium instead of Google Chrome for web apps, also add to your ~/.bashrc:
export CHROME_EXECUTABLE=/usr/bin/chromiumInstall Android Studio
Details of how to install Android Studio are beyond the scope of this blog post, but it’s pretty straight forward if you follow the instructions on the Android Studio website. I use the following steps:
- Download Android Studio from the Android Studio website.
- Extract to your desired installation directory:
tar -zxvf android-studio-<version>-linux.tar.gz -C /path/to/install/dir/ - Run the binary to complete the installation:
/path/to/install/dir/android-studio/bin/studio - Set up a
.desktopfile for Android Studio.
Now run flutter doctor. This will pull in some other Flutter dependencies, and will tell you what else needs to be installed/fixed. You can run flutter doctor at any time:
$ flutter doctor
Doctor summary (to see all details, run flutter doctor -v):
[✓] Flutter (Channel master, 3.32.0-1.0.pre.490, on Arch Linux 6.14.5-arch1-1, locale en_GB.UTF-8)
[!] Android toolchain - develop for Android devices (Android SDK version 35.0.1)
    ✗ cmdline-tools component is missing.
      Try installing or updating Android Studio.
      Alternatively, download the tools from https://developer.android.com/studio#command-line-tools-only and make sure to set the ANDROID_HOME environment variable.
      See https://developer.android.com/studio/command-line for more details.
    ✗ Android license status unknown.
      Run `flutter doctor --android-licenses` to accept the SDK licenses.
      See https://flutter.dev/to/linux-android-setup for more details.
[✓] Chrome - develop for the web
[✓] Linux toolchain - develop for Linux desktop
[✓] Android Studio (version 2024.3.2)
[✓] IntelliJ IDEA Community Edition (version 2024.3)
[✓] Connected device (3 available)
[✓] Network resources

! Doctor found issues in 1 category.
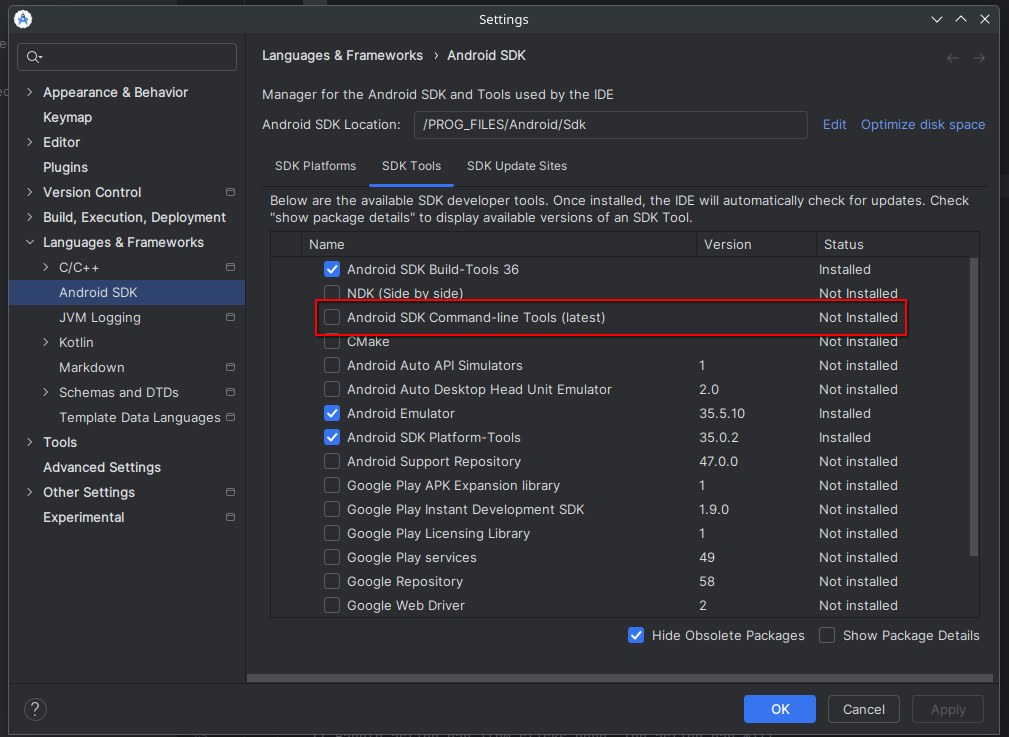
Let’s deal with the first issue and install the cmdline-tools:
- Open Android Studio.
- Navigate to Tools > SDK Manager.
- Click on the SDK Tools tab.
- Click the checkbox to tick Android SDK Command-line Tools (latest).
- Click on the Apply button.
Find where sdkmanager was installed and then add this to your path:
$ sudo find / -name 'sdkmanager'
/path/to/install/dir/Android/Sdk/cmdline-tools/latest/bin/sdkmanager

# Add permanently to path in your ~/.bashrc:
export PATH=$PATH:/path/to/install/dir/Android/Sdk/cmdline-tools/latest/binAgree to the licenses:
$ flutter doctor --android-licensesRun flutter doctor again, it should now show that everything is okay:
$ flutter doctor
Doctor summary (to see all details, run flutter doctor -v):
[✓] Flutter (Channel master, 3.32.0-1.0.pre.490, on Arch Linux 6.14.5-arch1-1, locale en_GB.UTF-8)
[✓] Android toolchain - develop for Android devices (Android SDK version 35.0.1)
[✓] Chrome - develop for the web
[✓] Linux toolchain - develop for Linux desktop
[✓] Android Studio (version 2024.3.2)
[✓] IntelliJ IDEA Community Edition (version 2024.3)
[✓] Connected device (2 available)
[✓] Network resources

• No issues found!Finishing Steps
If you don’t want to send analytics back to Google to help improve Flutter:
flutter config --no-analyticsChoose which Flutter “channel” you wish to use (the default is master):
$ flutter channel
Flutter channels:
* master (latest development branch, for contributors)
  main (latest development branch, follows master channel)
  beta (updated monthly, recommended for experienced users)
  stable (updated quarterly, for new users and for production app releases)

# Switch to the "stable" channel: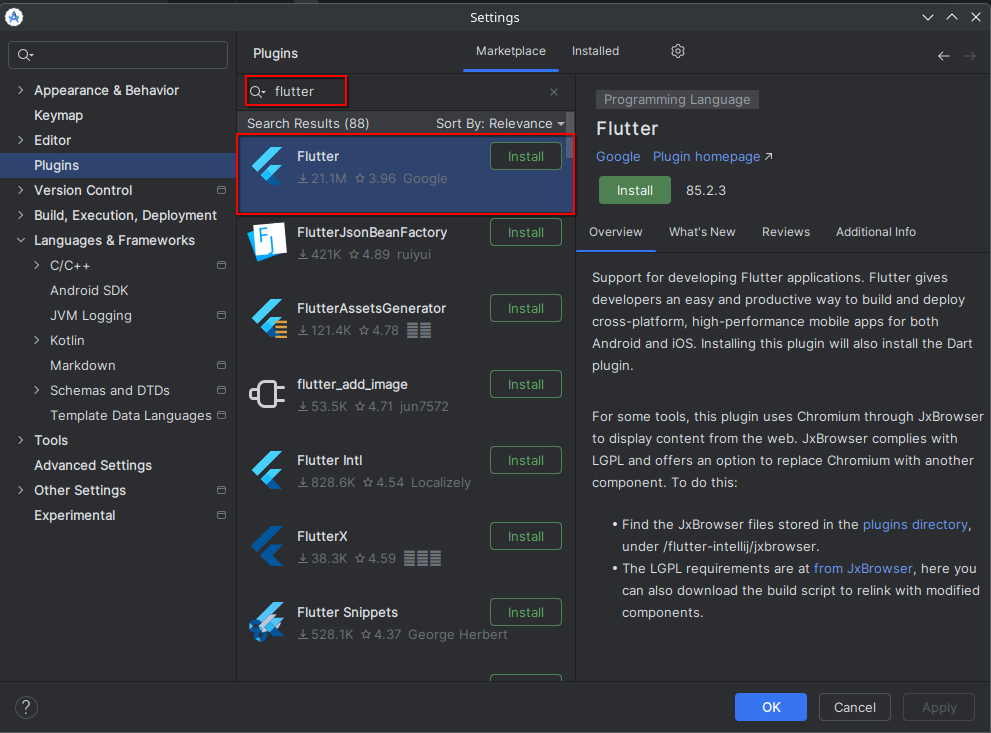
$ flutter channel stable Install the Flutter plugin in Android Studio:
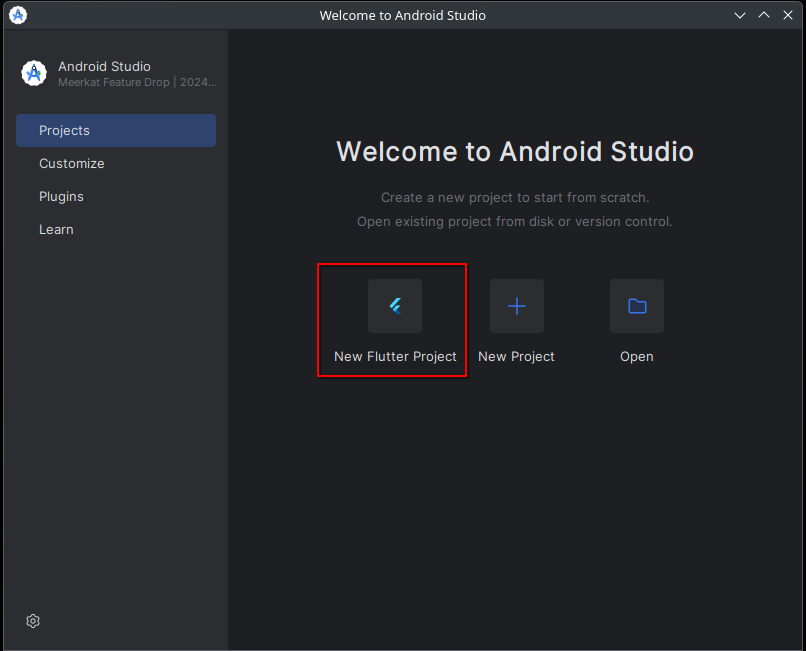
At this point, you should be able to create a new Flutter project from within Android Studio. However, you will need to do two more things before you can execute projects on an AVD or real device:
- Select the “Flutter SDK” (which is basically just the directory where you installed Flutter).
- Install (if you haven’t already done so) and select an “Android SDK”.
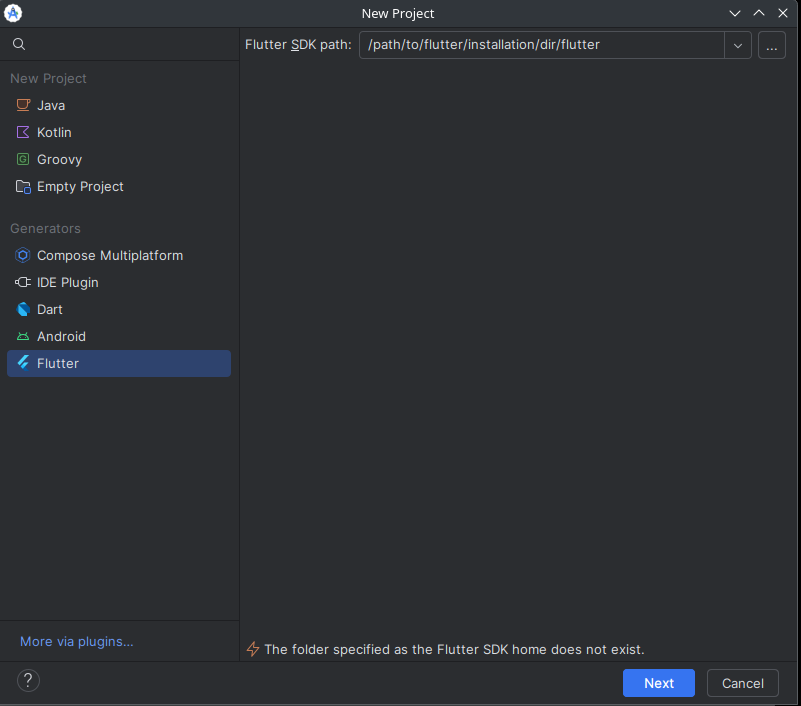
Creating a new Flutter project within Android Studio:
When creating a new Flutter Project, you will need to enter the Flutter SDK path (which is just the directory you installed Flutter in):
If you haven’t already selected an Android SDK to use for your Flutter project, the device selection will not display any attached Android devices (or Android AVDs that are running):
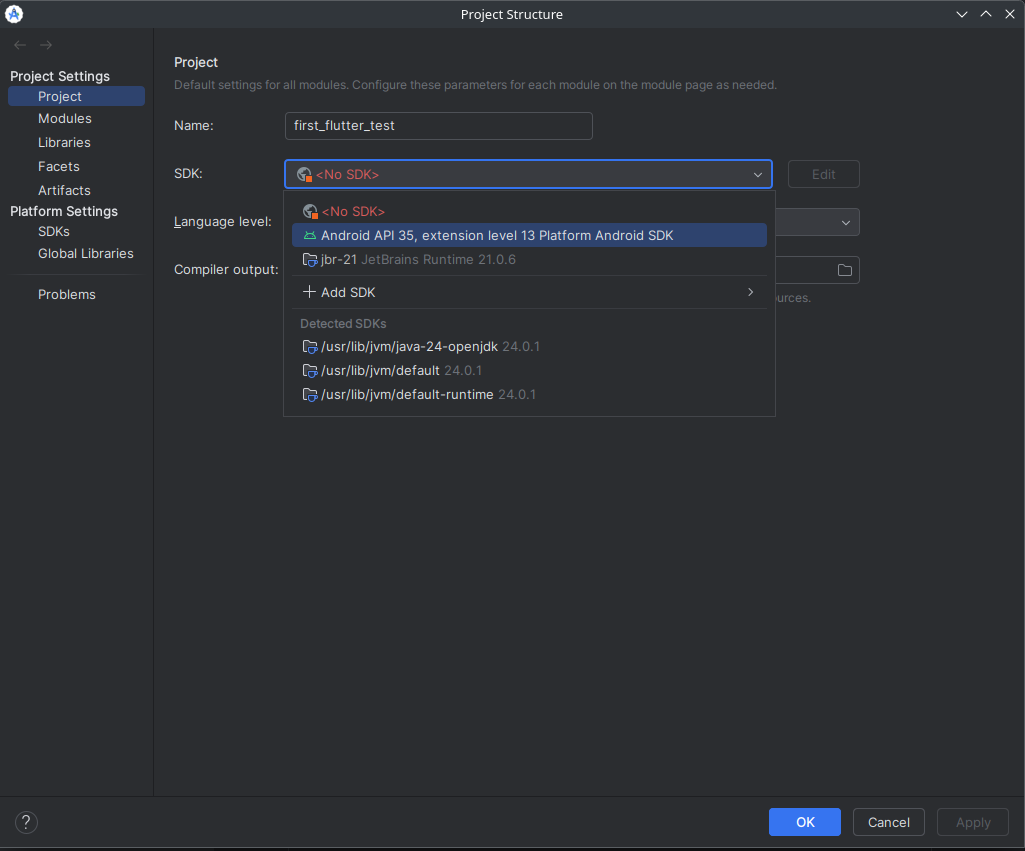
To be able to run Flutter projects within Android Studio on an AVD (Android Virtual Device) or real device:
- With the project open, select the “Menu” drawer.
- Select Project Structure.
- Under Project Settings, select Project (should be selected by default).
- Choose an Android SDK in the SDK dropdown.
That’s it, you’re good to go! So go forth, and code like there’s no tomorrow!!! 😉